Closet Build
The closet is done. It's not great but it's good enough and I don't want to work on it anymore because I have other things I want to do. I had planned for it to get done in two days. It took five. I am tired. But it is done.


Day 1: Prep
Last Tuesday, I brought the boards to the back patio to split into what I thought were the correct dimensions. (Little did I know, the dimensions inside the closet are different at the top vs. bottom and left vs. right, so I had to trim/sand them more later.) It's been a hot moment since I used the circular saw, so I was a little nervous, but I found that being on the ground made me feel so much more stable and confident. And because I was outside, I didn't have to vacuum all the sawdust after like every cut like I do in the garage. (My poor neighbor who was grilling on their balcony nearby though.)
I also glued the 2x4s that I was using for the side cleats together. I made the mistake of buying a board that wasn't completely flat, but I would make do. I also fired a few nails into it, mainly to test the nail gun that I bought quite a long time ago and hadn't used yet. Of course, I jammed it on my first attempt because the noise startled me and I let go of the trigger before it was done firing. Oopsie.
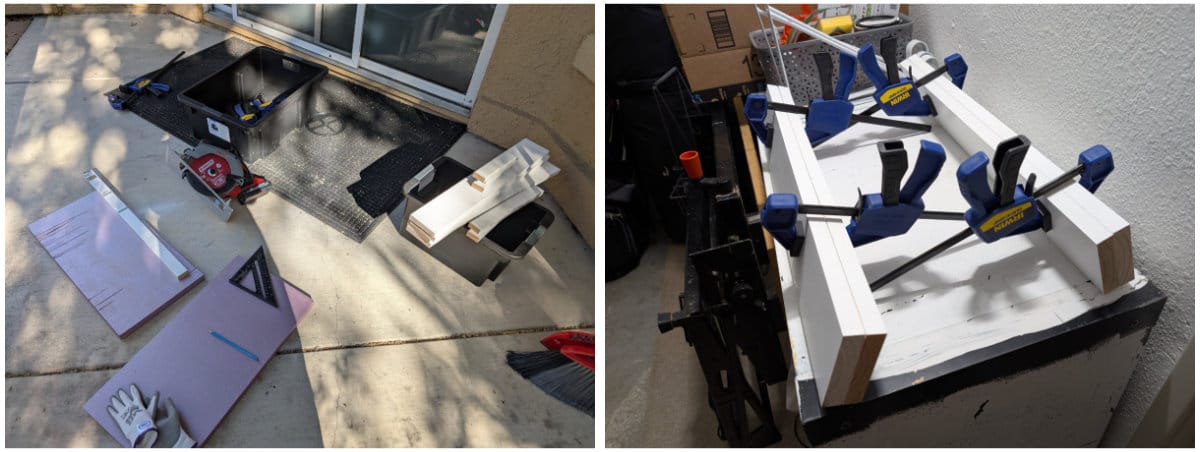
I left them clamped in the garage overnight to dry.
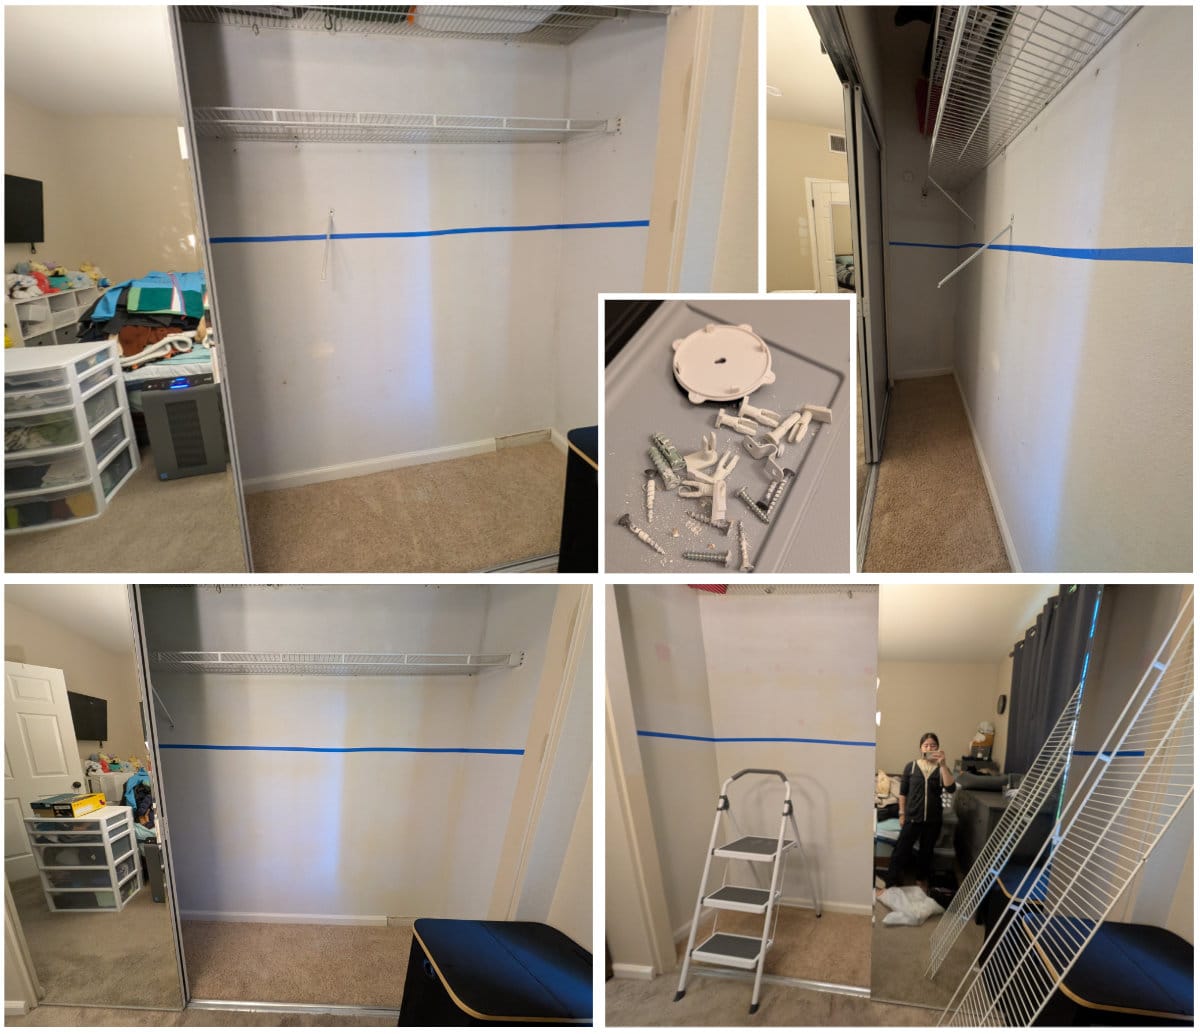
I also took everything out of the closet to patch the holes and test some measurements. I just had piles of clothes on the bed (and eventually piles of clothes in the office when I actually took down the old shelf/rod).
I verified that I did need another 1x4 spacer to secure the rod to both sides. Wasn't sure I was going to this... but would figure it later when it came time.

I pulled all the old screws, anchors, and other hardware off the walls. Then I patched and painted the holes. I found out that the previous owners did not in fact leave any paint for the closet. So maybe it was not the most recent owners who painted it. I used the Behr Off White paint sample I had to paint over the patched areas so it's sealed at least. Now the closet is at least three different colors. How fun.
Note: Picture below also includes progress from Day 2.
Day 2-4: Remove old shelf and attach new shelf cleats
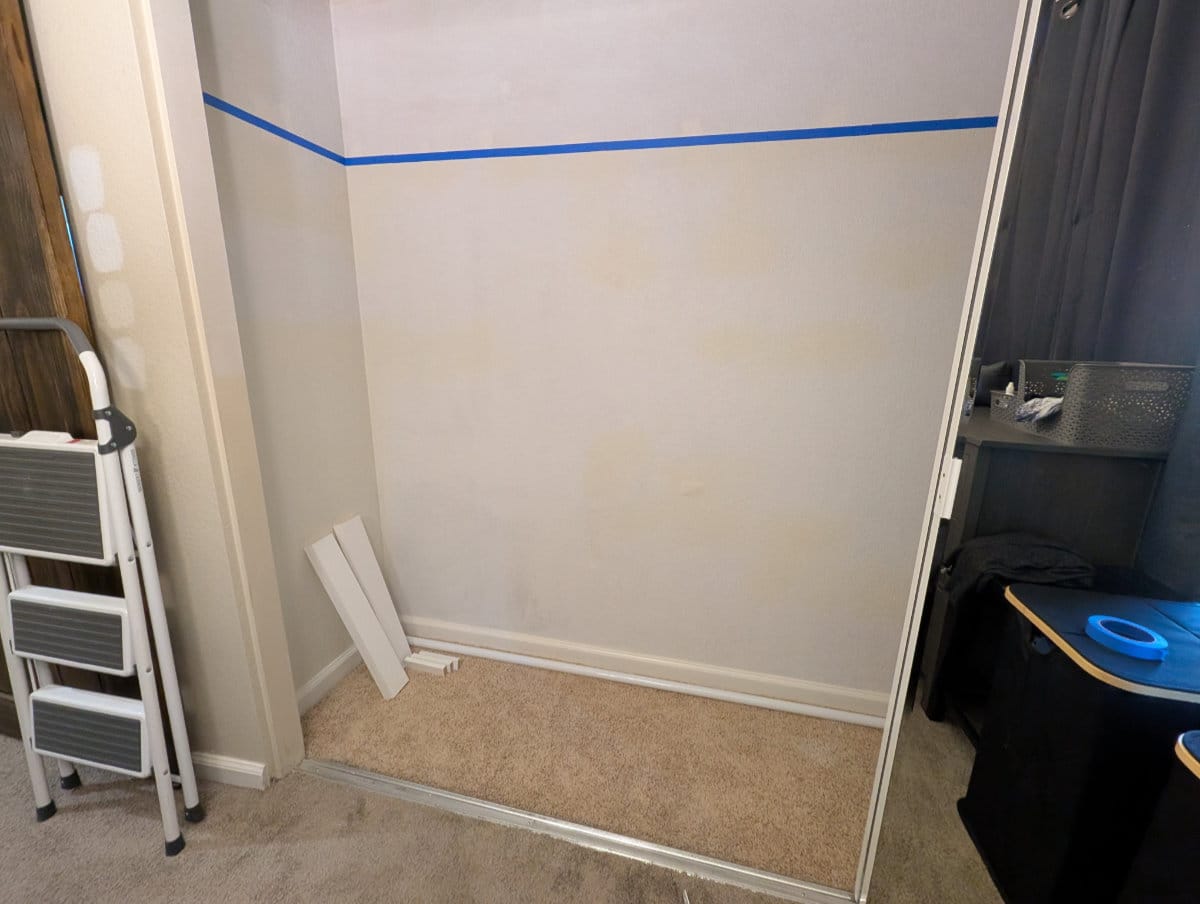
I finally took the shelf down and patched the rest of the holes. I don't think I bothered to paint over those because the new cleats/shelf would cover it anyway.
Here is the closet completely patched! It's already looking better. I also used a laser level to put up tape where I wanted the shelf to be so I could start attaching stuff to the wall.
The rest of my progress for this part was very, very slow. I had a lot of difficulty driving screws into the boards and studs using my drill. (Alas it is but a drill, not an impact driver.) My sister was over, not specifically to help, but she did help me a little. She was able to drive the screws in most of the way (she is much stronger than I am), but she recommended using an impact driver.
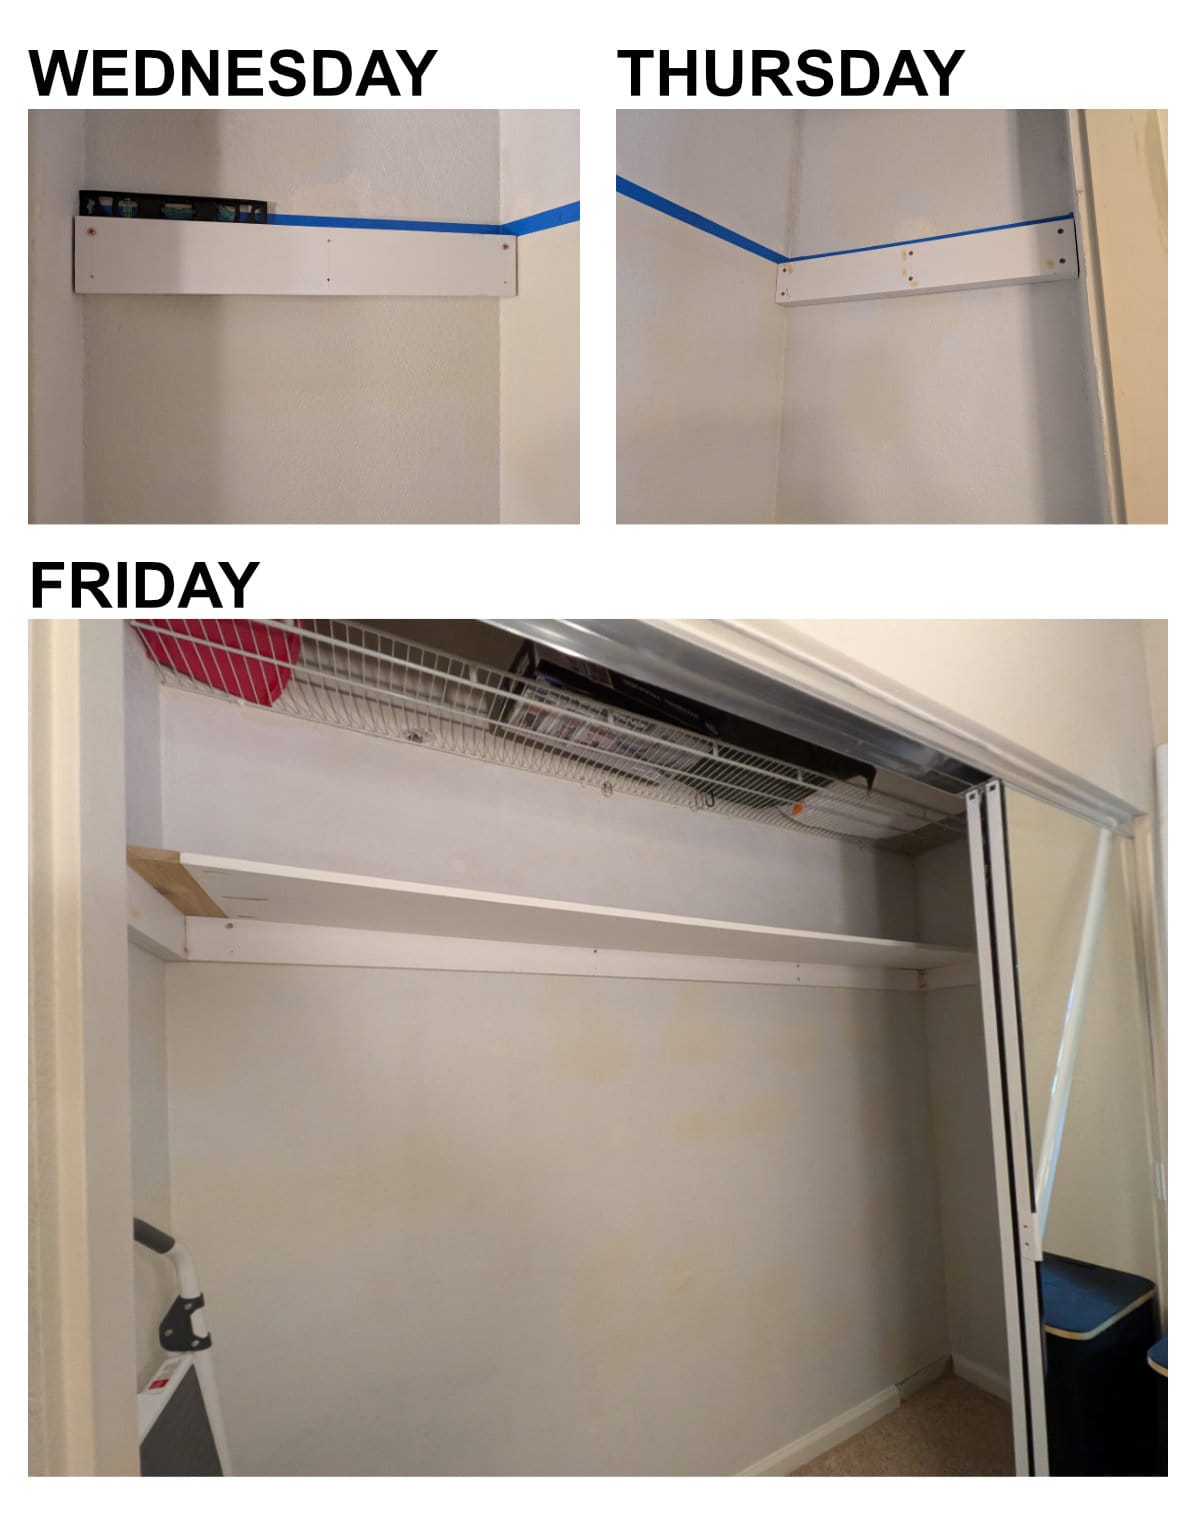
By the end of Wednesday, I had the left cleat attached by two screws, with four more to go. My partner also tried to help screw some in (using both the drill and manual screwdriver), with similar success as me.
On Thursday, my sister came back with her impact driver for me to test/borrow. And wow, it was significantly better. I still stripped a lot of screws lol but at least stuff was going in the walls. And I missed a lot and put small dents in the wood. With each screw, I got better at holding the driver and applying the right amount of pressure. But it was so so tiring. It was so much harder than doing Caroline Girvan workouts. But I was able to finish both the left and right cleats. I went out to dinner with a friend and didn't return until almost 10pm, so it was a bit late to continue working unless I wanted my neighbors to hate me (the impact driver is much noisier than the drill).
On Friday morning, I decided I would buy my own impact driver. Home Depot had drill/driver set + "free tool" deal, and my sister happened to have been wanting one of the offered free tools. So yes, I now have two drills. But the new one is smaller! Perfect for my small, weak hands. And it's brushless.
I still lacked a good driver bit (I could pick up the tools in-store, but the bit set I ordered needed to be shipped and wouldn't arrive until tomorrow). My sister came over again, mainly to pick up the new tool, but I borrowed her better driver bit while she was here. She ended up letting me keep it since she has more at home.
I got the back panel mostly attached. It was a longboi, and I could have asked my sister for help, but I'm a strong independent woman who will always try to find a way to get things done without help. So instead I used a ladder leaned against the wall to prop the opposite end into place, while I attached one side.
Fun fact: I have one 2-step ladder in the kitchen, one 3-step ladder in the laundry nook (at opposite ends of the house), and one 5.5-foot normal ladder in the garage. Because as an under 5-foot person, I always need a ladder.
Then, one of my friends came over for about an hour to kill time before we had dinner with other friends. She helped me raise the shelf on top of the cleats to test that it does in fact fit. I forgot to mention, I used pocket holes to attach a piece of wood to the shelf to extend it by about 4 inches. Not the most secure but I don't think I need it to be. I'm not putting anything very heavy on the shelf. And the rest of the shelf will be supported by the back cleat and shelf/rod brackets.
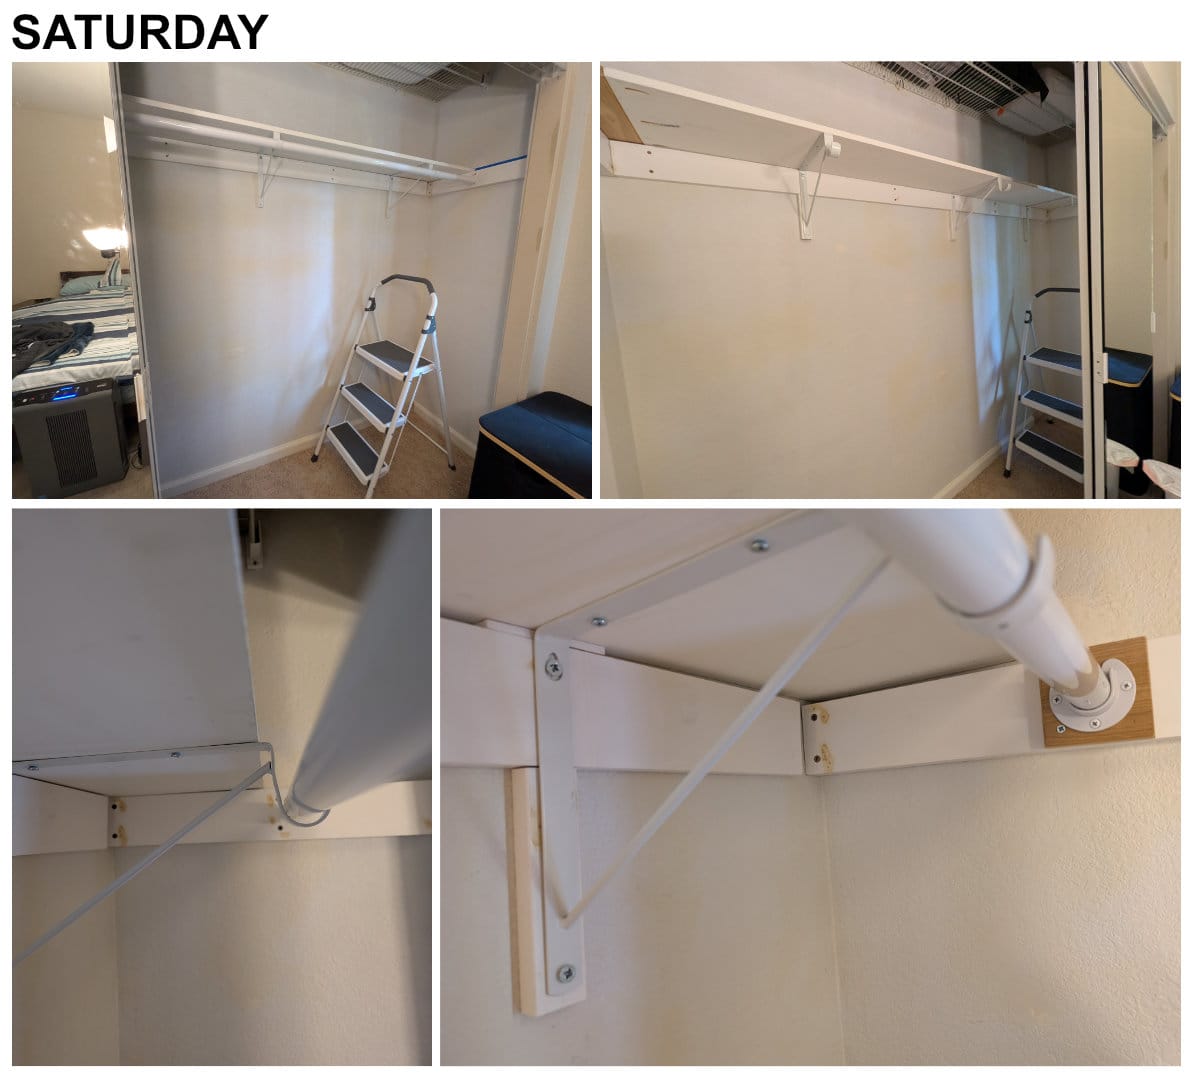
Day 5: Shelf and rod
The final day. Well, I wanted it to be the final day because I wanted a functional closet again, and I wanted to be able to use my desktop again (my pile of clothes in the office was in the way of my desk).
I think I still had a few screws to drive into the back panel. Then I tested the bracket positioning and if the shelf (I lifted it by myself this time hehe) and rod would sit correctly on them. It seemed like they would...
I first partially screwed the top of the brackets into the wall, so I could figure out where to screw the bottom hole. I also added spacers behind the brackets, since the top half of the bracket was on the back cleat, not directly on the wall. I cut the spacers a tad short because I didn't take into account that the brackets aren't perfectly square when I measured them. The spacers are also MDF because I use random wood that was in the garage from before my time. MDF sucks to drill into.
Well, after I screwed the brackets to the wall, and the shelf to the brackets, I was like, I'm almost done???
I put the rod on the brackets... but it only sat on two of the brackets!!! What happened??? I thought even if my measurements weren't exact and even if the boards aren't completely level, they would be close enough. I think it was a combination of the cleats not being level and the brackets having minor shape differences that cause the far right bracket to be slightly lower than the others. My fix was to just raise it a little. So now the shelf is floating on nothing in the back right corner. I probably will just leave it like that. I am absolutely not worried about the structural integrity in that corner because we just keep a plastic laundry hamper up there.
With that fixed, I had my final problem to tackle: adding a spacer to the side so the rod can actually sit in the rod support.
I ended up cutting a 4x4 square and screwed that into the cleat. In retrospect, I should have covered the entire cleat (i.e. adding another 1x4 to the stack). But it is what it is. I can always redo it later.
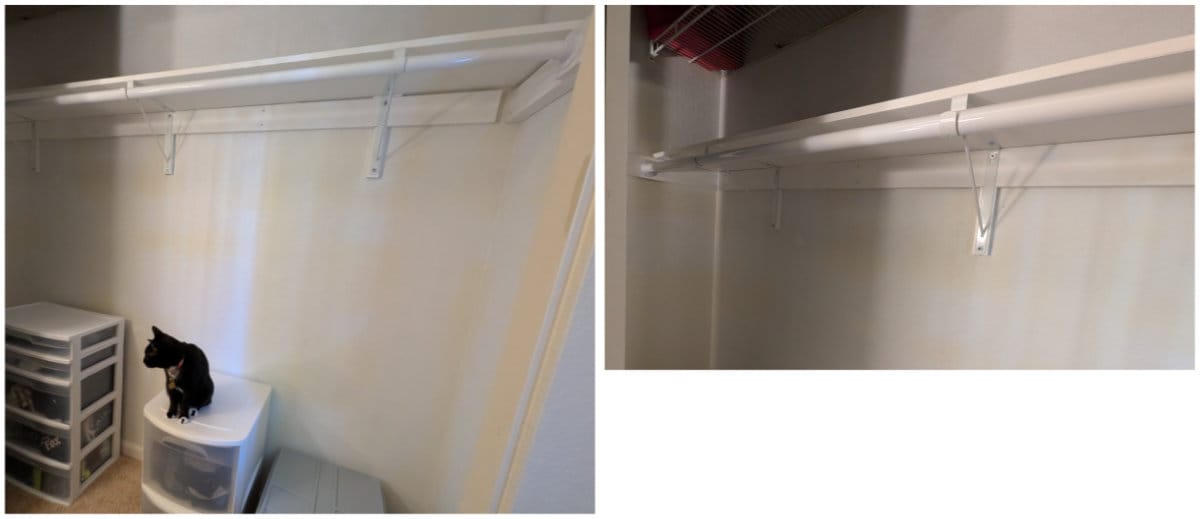
After attaching the rod supports, the final step was to paint over the dented spots (that I already smeared wood filler into), non-painted surfaces, any dirty spots, and some of the screws. I used a paint sample of Behr Ultra Pure White, which I was testing for trim. And it actually looks pretty decent! Just don't look too closely.
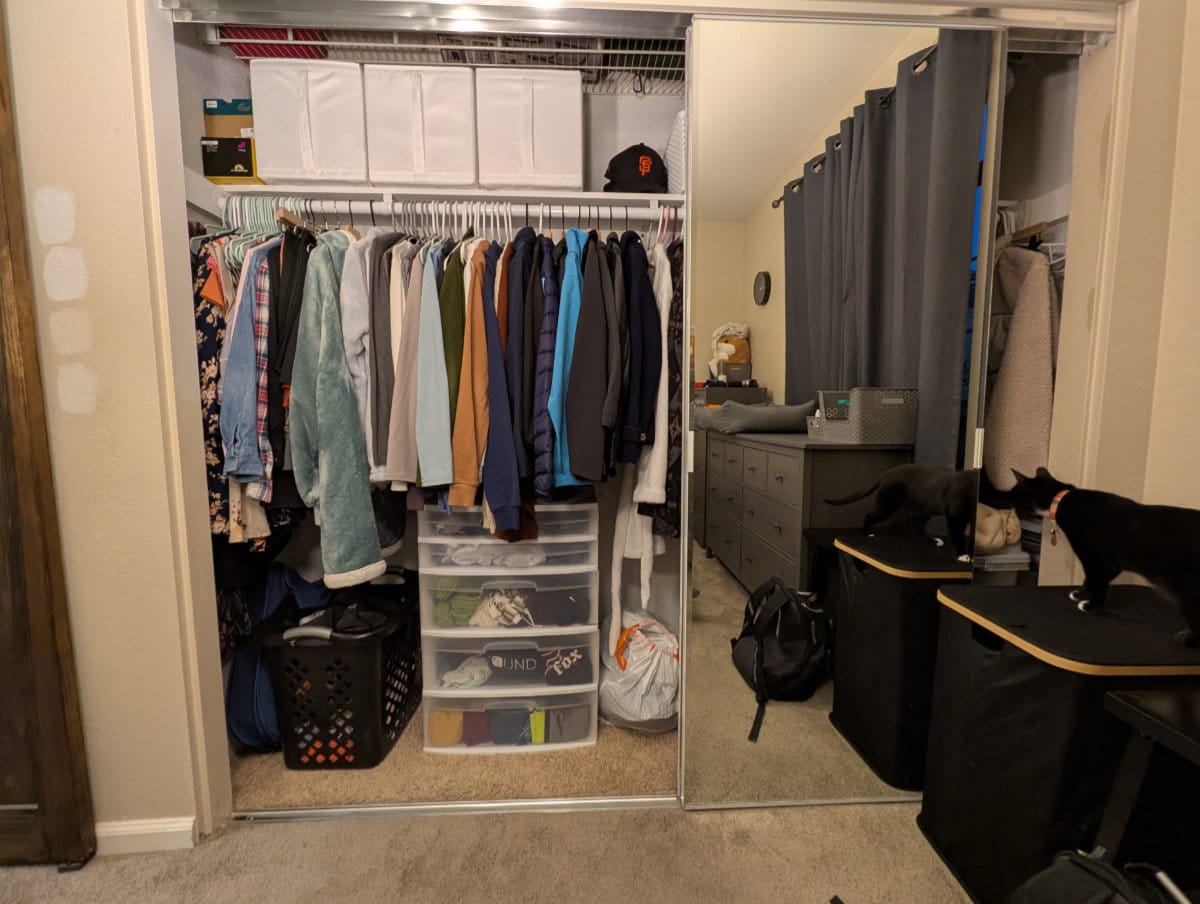
I am so glad this project is over.
And I am so happy I can slide my hangers on the rod so much easier than before and I can make enough room to grab something off a hanger without knocking off adjacent items! I also made the shelf/rod about 1-2 inches lower than it was before, so my vertically challenged self does not have to struggle as much. Because why should I have to struggle in my own home.
Cost
I don't know how much it would have cost to get it done by a professional, so I can't say with confidence that I actually saved any money. I would have saved time. But I learned a lot for my future projects, which I think is invaluable.
Costs include tax and are rounded up or down to the nearest 50-cents for ease of calculation.
| Qty | Item | Cost |
|---|---|---|
| 1 | 1-in x 12-in x 8-ft Primed Pine Finger-Joint Board | $36.50 |
| 2 | 1-in x 4-in x 8-ft Primed Pine Finger-Joint Board | $23.00 |
| 1 | Everbilt 96-in White Heavy-Duty Steel Closet Rod | $31.00 |
| 1 | Everbilt 1-5/16-in Heavy-Duty Closet Pole Sockets | $10.00 |
| 3 | Everbilt Heavy-Duty Shelf Bracket and Rod Support | $22.50 |
| 1 | #12 x 3/4-in zinc plated phillips flat head wood screw (10-pack) | $1.50 |
| 3 | #14 x 2-1/2-in zinc plated phillips flat head wood screw (2-pack) | $5.00 |
| 1 | #8 x 2-1/2-in yellow zinc plated phillips bugle head screws (88-pack) | $10.50 |
| 1 | #10 x 3-12-in yellow zinc plated phillips bugle head screws (54-pack) | $10.50 |
| $150.50 |
Most of the materials were used in their entirety. I only have a few #12 screws left, and most of the #8 and #10 screws, which I will definitely use for my future office closet renovation.
I also spent about $150 on a new Milwaukee M12 FUEL drill, driver, and batteries. I intentionally got a set with two batteries since I didn't have any M12 batteries yet (I only had M18 tools until now). And $20 on a laser level. These will also be reused for the rest of my life, so also not included in the total.
Also not included in the cost are materials (random wood pieces) and tools (circular saw, sanders, drill, bits, clamps, etc.) that I had already.