Tie Dress
I have finally completed my first major sewing project! Yay! (Use your imagination to visualize confetti falling from the sky and cats cheering in the background.)
I made the Sewing Therapy tie dress over four days. Two days to assemble the pattern, and two days to cut the fabric and actually sew. (Add an extra day if you count going to the store to buy fabric.) I want to say it was like 12 hours of work but I didn't keep track. It was probably more than that. And I'm pleased with the results! At least for now! I haven't worn it out of the house or washed it yet, so we shall see if it's comfortable long-term and if the shape holds up.
For reference, I made this in size 6 with short sleeves.
The fabric store
Two weeks ago, I paid a visit to Stonemountain & Daughter Fabrics in Berkeley. I had to hype myself up to go because I absolutely hate driving in the "real East Bay" like Oakland, Berkeley, etc. But I had read good things about it online and heard good things about it from a friend. And there really aren't many options for buying fabric in person that don't involve driving a bit and dealing with questionable parking...
I did read reviews ahead of time to assess the parking situation, so I wasn't surprised about the street parking and where to find free street parking. I spent about 1.5 hours browsing and touching fabrics, and re-browsing the same fabrics to see if I changed my mind. They have a selection of half-price fabrics upstairs where I spent a lot of time, and ultimately, all the fabrics I chose were from there. I don't want to invest too much in my first makes because there is a decent chance they will not go well.
But alas, I did not choose fabrics that are easy to work with. I naturally gravitate toward light airy fabrics, and that is what I ended up with. Some rayon crepe and double gauze. But I'll uh make it work.
The sewing
I did the prep work of printing and assembling the pattern 1-2 weeks earlier. Some of the pieces were just rectangles, so I opted to measure and cut them from kraft paper myself instead of printing them.
This week, I finally decided it was time to sew. With the bathroom painting done, this was the last project I wanted to complete before my sabbatical was over.
I spent Tuesday cutting the pieces out. This was extremely difficult. I used rayon crepe for it, and it was difficult for a few reasons.
- It is very light, so it moves easily when trying to cut it. I could barely draw a line on it because whatever marker/pen I would use just dragged the fabric with it.
- It also has a crinkle texture, so again, it was hard to outline the patterns, and there was also extra volume that made my cuts wonky.
- It is not a stretch fabric, but because of the lightness and texture, it almost felt like I was working with a stretch fabric.
I tried to remedy this by pressing the entire thing with an iron. So... at least the texture was gone and it made cutting accurately a little easier. And whether or not that means my garment will end up wonky after I wash it... We'll find out in a few days LOL. I am hoping the pattern of the fabric and the loose fit of the garment will hide any twisting that happens.
After all the cuts were done — with one bad cut that I reused for smaller pieces, and one bad cut that couldn't be reused, and a lot of bad planning to use the fabric efficiently — I barely had any fabric left of the 3 yards I purchased. So I hoped that I wouldn't mess up later and need more fabric.

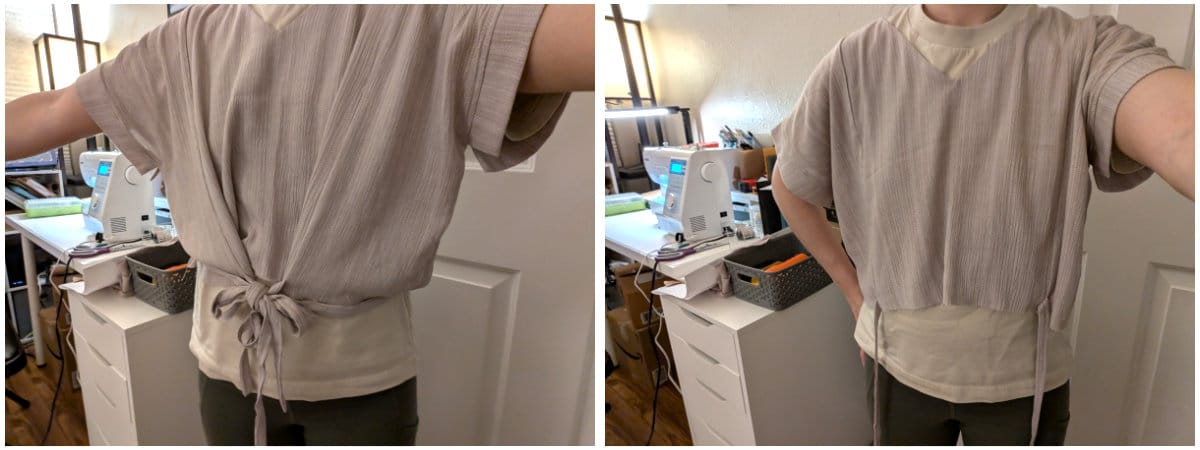
On Wednesday, I sewed the top. I followed along with the video tutorial, which was very nice, because the written instructions are a bit sparse and I'm not skilled enough to fill in the blanks yet.
Most of it went smoothly. I did have to rip a decent amount of stitches because I am not good at sewing on the intended line. I also tried a new stitch for finishing the seams. The first set, I used a zigzag stitch, but for the remaining, I used an overlock stitch. My zigzags felt very secure but also rather stiff. The overlock stitch felt softer to the touch, looks a little more polished, and it was easier to do since the overlock foot has a guide.
I tried it on over my shirt just to make sure it was going in the right direction.
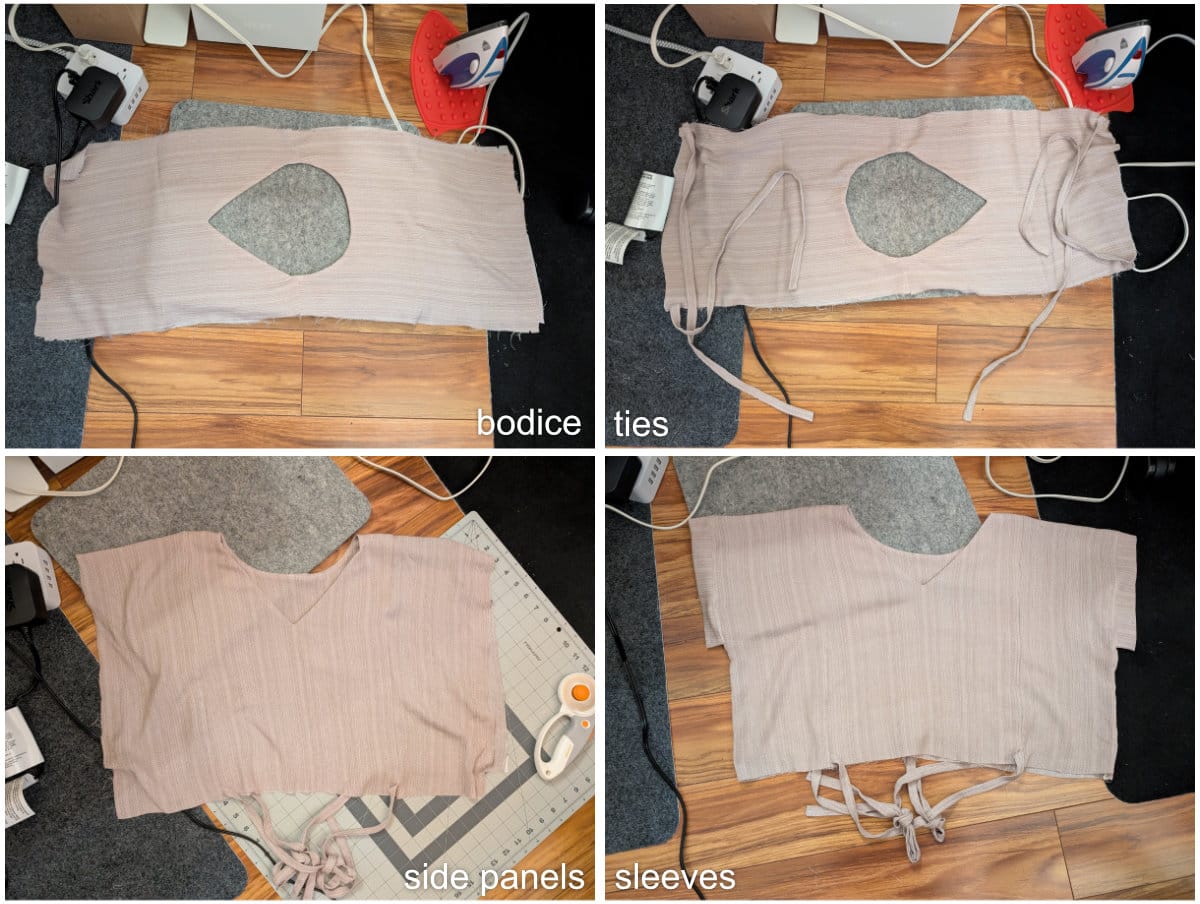
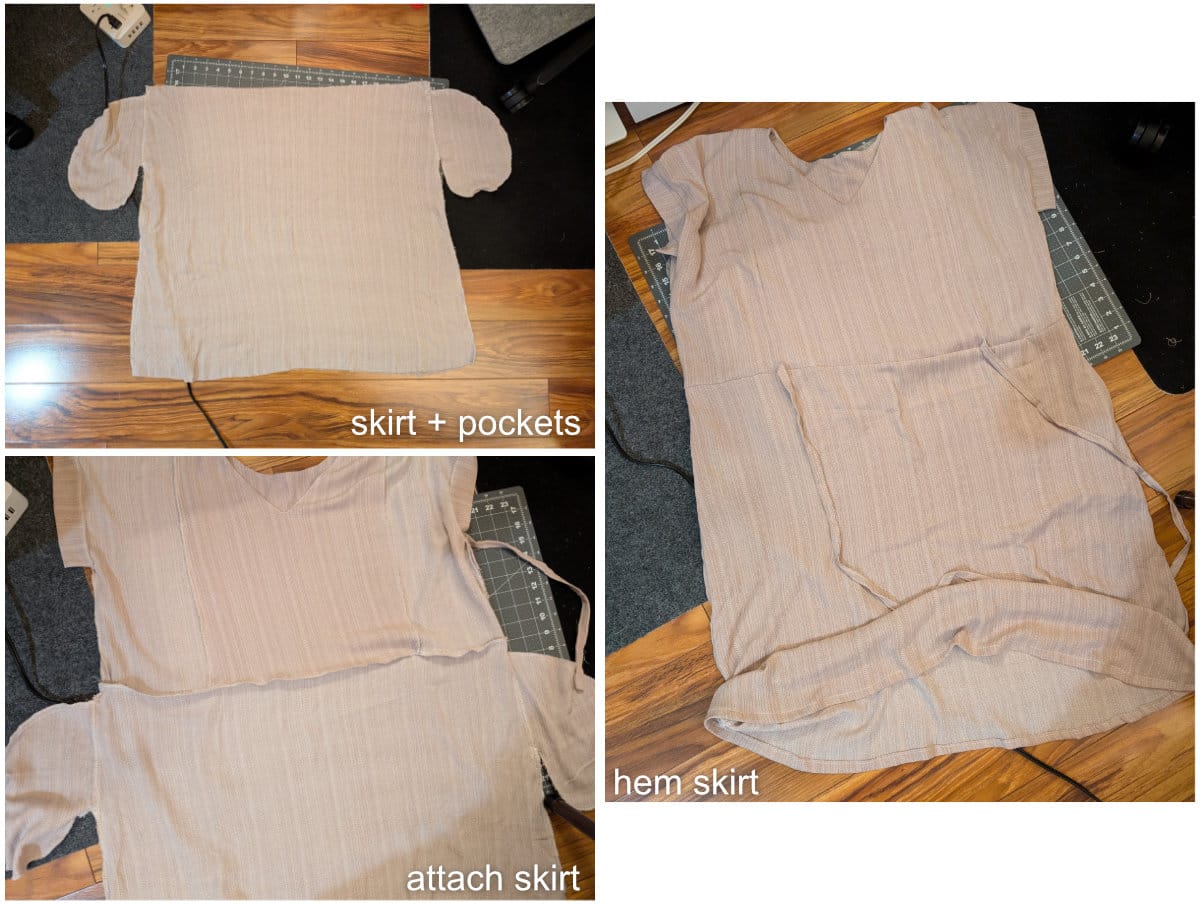
Then on Thursday, I sewed the bottom. Everything was pretty straightforward until I got to the step to attach the top and bottom. My wonky cuts came back to haunt me, as I knew they would. At the time of cutting, I decided I would deal with it later, and later had finally come. The curves at the top and bottom of the skirt were scalloped, for lack of better description (you can see it in the first picture with the pieces cut out). So I tried to even it out so I could actually pin the pieces together.
I did the best I could.
I definitely stretched the fabric when sewing them together. Oops.
But the drapey-ness of the fabric, at least right now, is hiding all my mistakes.
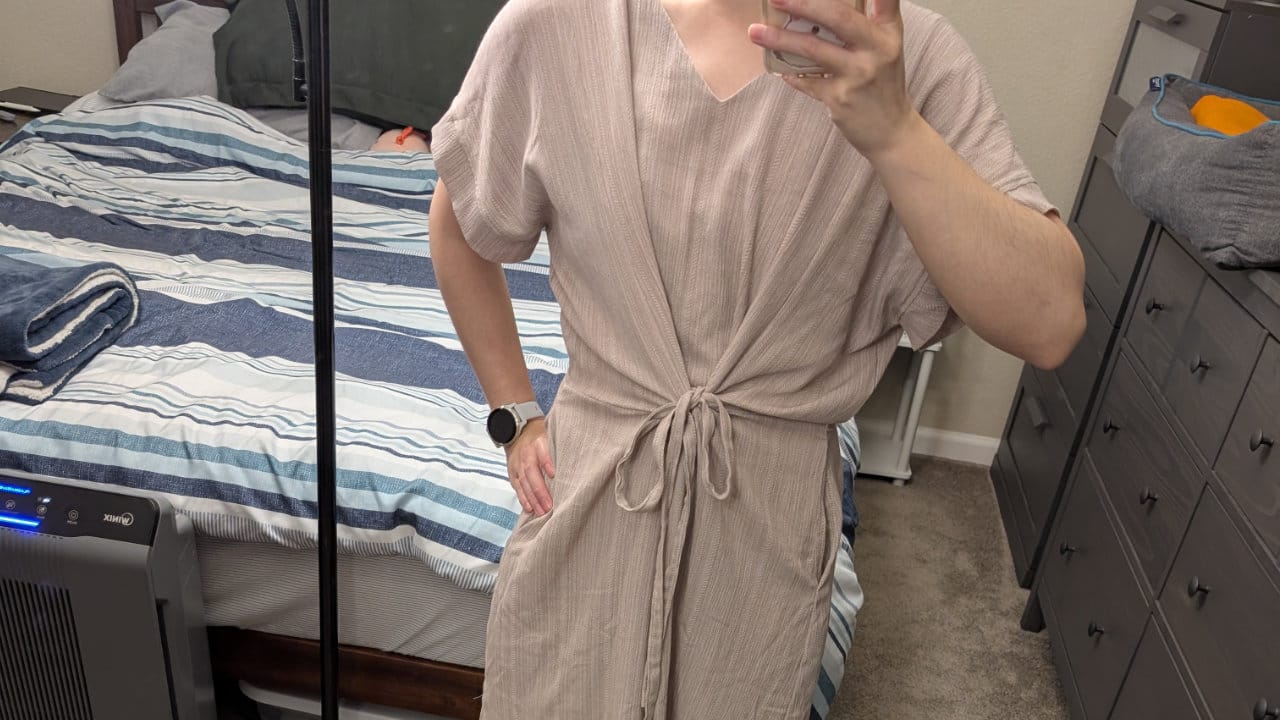
And finally, I have a dress that I made myself! I was wondering if it would look too potato sack or hospital gown on me (not helped by the fabric I chose lol), but when I tie it right, I think it's pretty cute. AND IT HAS POCKETS!
I made a video to demonstrate the versatility, because I don't think pictures do it justice.
I haven't made a video in a long time. I had a minor vlogging phase at the beginning of the pandemic and the phase never returned. But I learned a new trick in DaVinci Resolve today to add a blur to the edges.
My next sewing project will likely be more shorts to lounge around at home in because oh boy do I love lounging around at home. Although I'll be doing a lot less of it soon.