Tie Dress #2
I made another tie dress. This time I made it in a smaller size with elbow-length sleeves. I like this one much more than the first one.
Once upon a time, I sewed a dress.
It was the first dress I ever made.
I was proud of it. And I still am.
But the more I wore it, the more acquainted I became with its flaws.
The waistline was too low. The fabric could not hold a flattering shape. It felt light and heavy at the same time.
I considered taking apart some parts to raise the waistline, but there was no guarantee I would be able to put it back together with the same quality, and that wouldn't fix the issue of fabric choice. So I was determined to make another one. A better one.
The actual construction was more or less the same as the first dress. And despite having made it before, I think it took me even longer the second time because I spent more time:
- "shopping" for fabric from my collection
- making adjustments to the pattern
- pattern matching the fabric
- undoing and redoing lots and lots of stitches because I will not settle for anything less than perfection
Fabric
I wanted to use two different fabrics to create more visual interest. The tie dress pattern already has separate pieces for the main bodice, the sides of the bodice, the sleeves, and the skirt. I also had a vision of making a dress that looked like a pinafore over a shirt but was actually a single piece. So I would have the main bodice and sleeves be the "shirt", and the sides and skirt be the "pinafore".
Now the question was, which two fabrics should I use?
At this point, I had fabrics from various mystery bundles (online and from Facebook marketplace) and a few individually selected fabrics. They have filled two plastic bins under my bed.

I consulted both a friend and my partner at separate times about which two fabrics would pair well together. In the end, I decided on a gray chambray and yellow plaid. (Yes, another yellow plaid.) Both of them are from Fabric Mart. Honestly, I might have gotten the yellow plaid to make another tie dress, but I don't remember anymore. And the gray chambray, I originally bought to make the Sewing Therapy ele skirt. (I probably have enough fabric to make a skirt still, since I used less than a yard.)
To decide which one should be the used for what, I drew a sketch and colored it in.
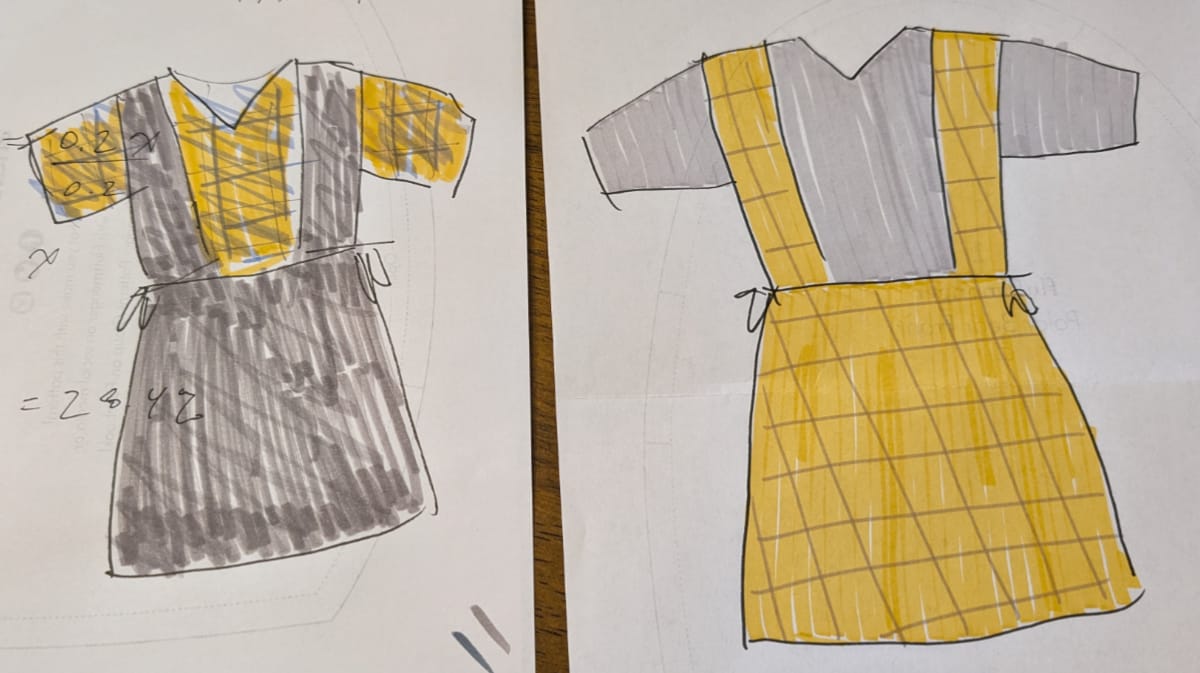
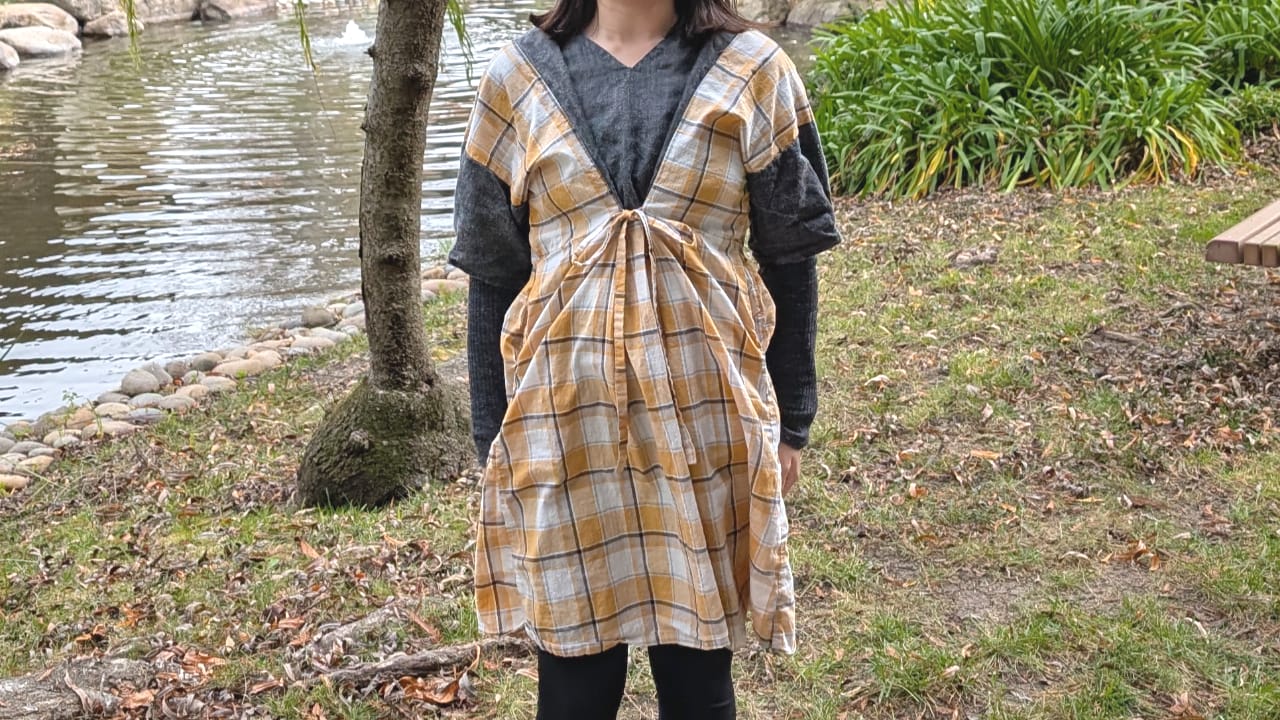
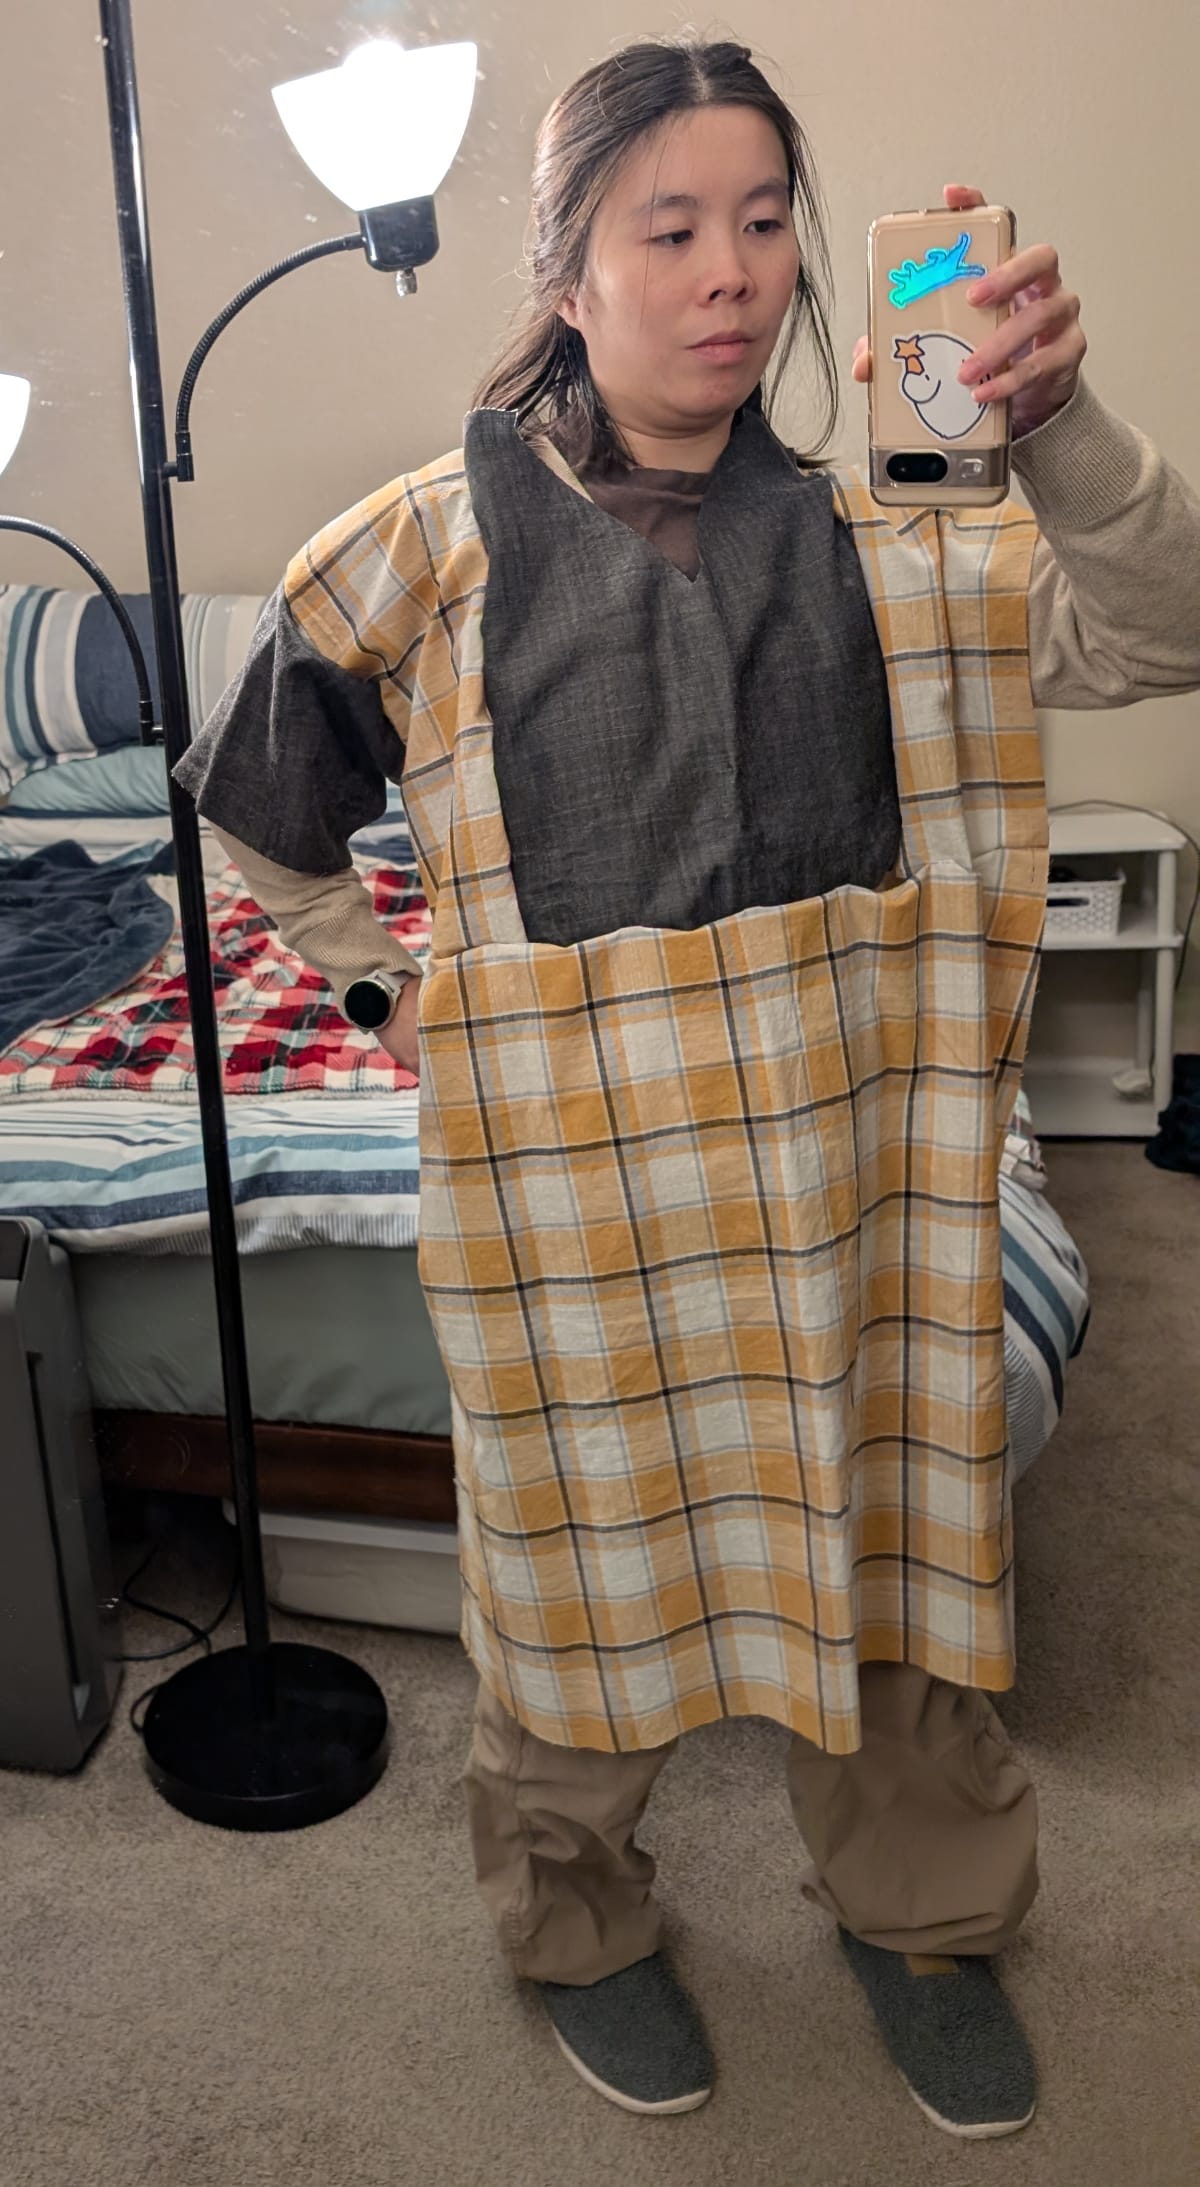
The left one was giving me Japanese school girl vibes. I also already have a lot of gray in my wardrobe, so I thought it would be more fun to have yellow be the main color. It would also be convenient to have the gray as the "shirt" so I can layer a plain gray long-sleeve shirt underneath when it's cold. (I have worn it this way multiple times already and it is wonderful.)
Adjustments
I printed out the pattern for size 4, taped it together, and cut it out as-is.
I tried using washi tape instead of normal tape to tape the pages together because I have an excessive number of washi tapes that I will never be able to use up (I used to use them in my bullet journal but not anymore since my journal has been digital since the end of 2022). And wow my paper pattern looks soooo cute with washi tape! Not that the pattern needs to look cute. But I am all about aesthetic even for things that don't matter.
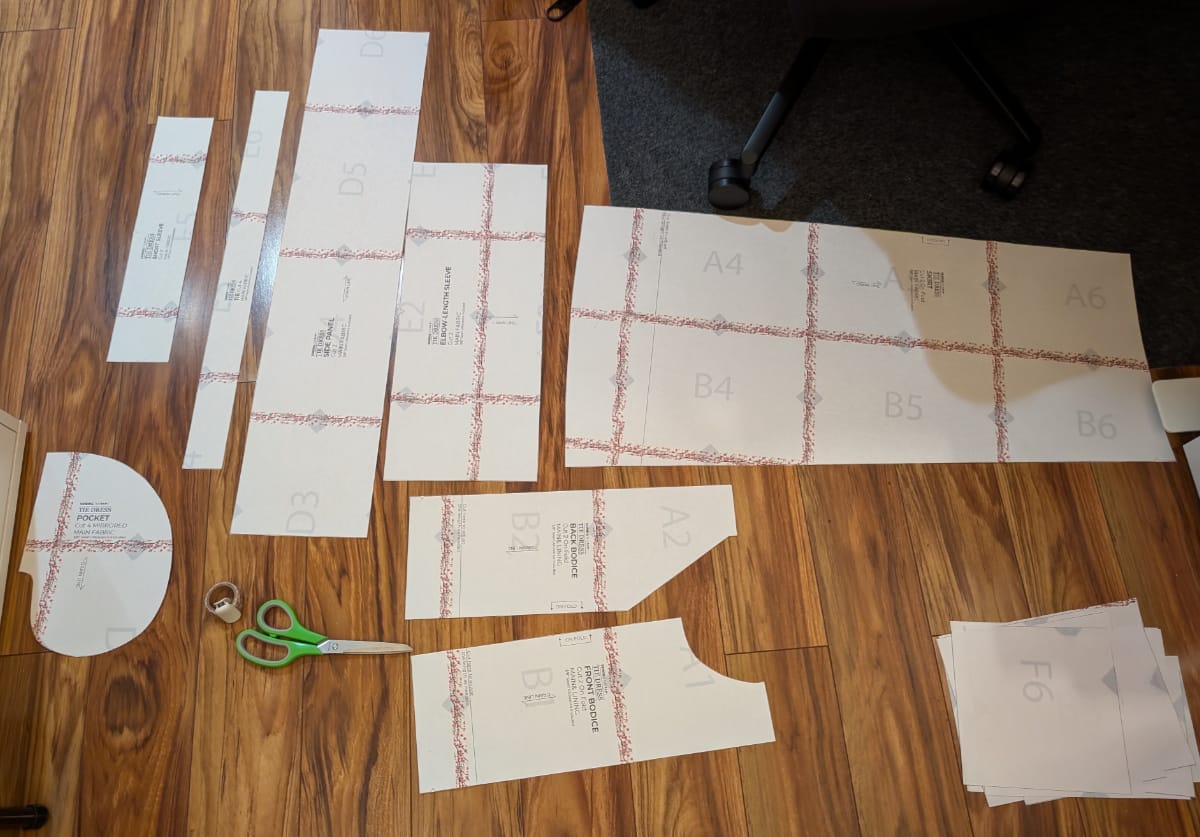
After cutting them out, I made adjustments to the pattern. I ended up reducing the bodice length by 2" and the skirt length by 7". I think the skirt adjustment is about the same as the first dress, but with the additional bodice adjustment, it should be more proportional.
Adjusting the bodice also meant I had to adjust the side panels. I calculated and measured many times to make sure they would line up.
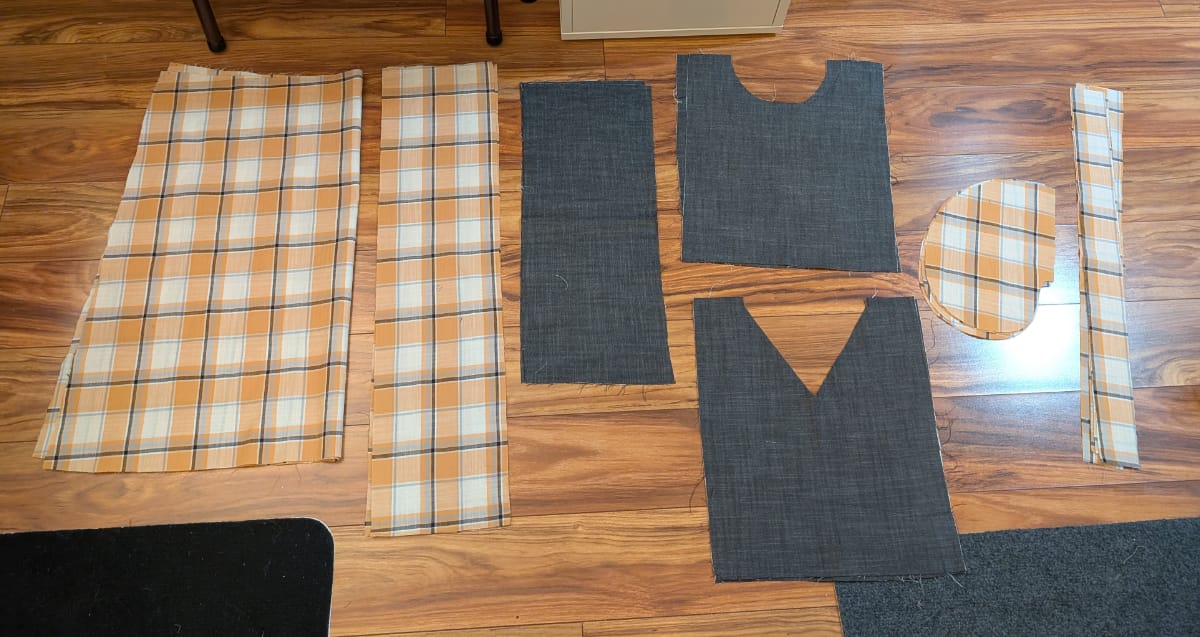
Then I could move onto cutting out the fabric.
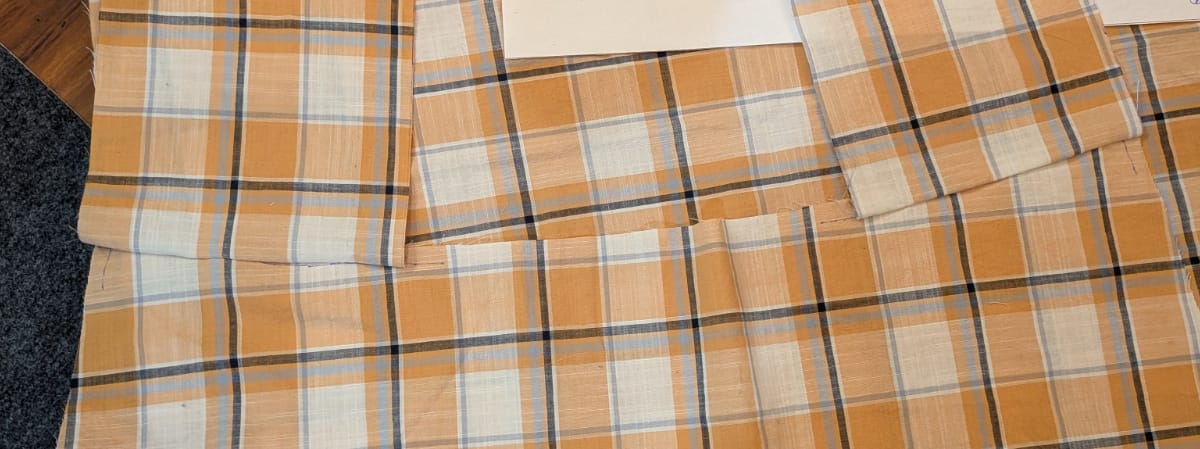
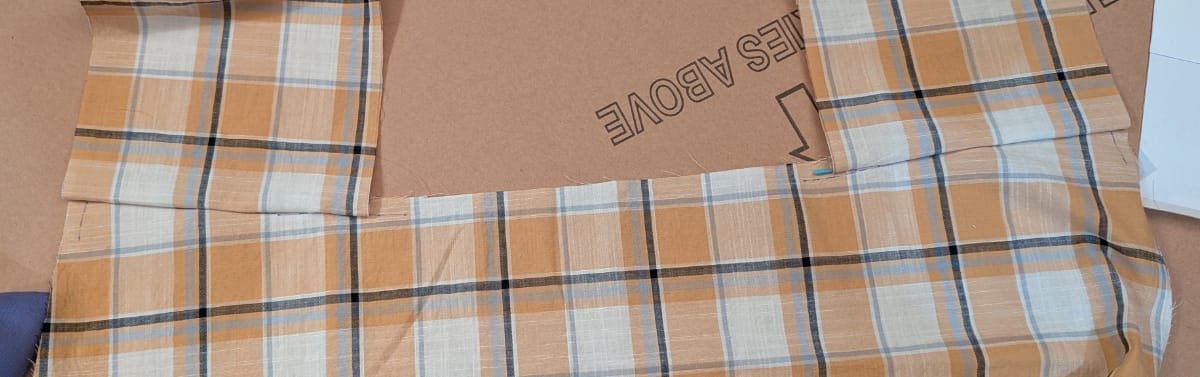
Pattern Matching
The hardest part of cutting out the fabric was pattern matching. It took a bit of trial and error to figure out how I should determine where the "pattern matched" while accounting for seam allowances and how the fabrics would curve after sewn together.
I only messed up once. Can you spot the difference?
Before and after
I decided that I would only match where the bodice and sides met. The sides would not match because no one will be looking at my sides.
After cutting all the pieces, I clipped/pinned them together to test the general fit and do a final check that the pattern matching was what I wanted.
And I'm not gonna lie.
It did not look cute at this moment in time.
But I was going to trust my vision.
I look unimpressed. But that's also just how I look all the time.
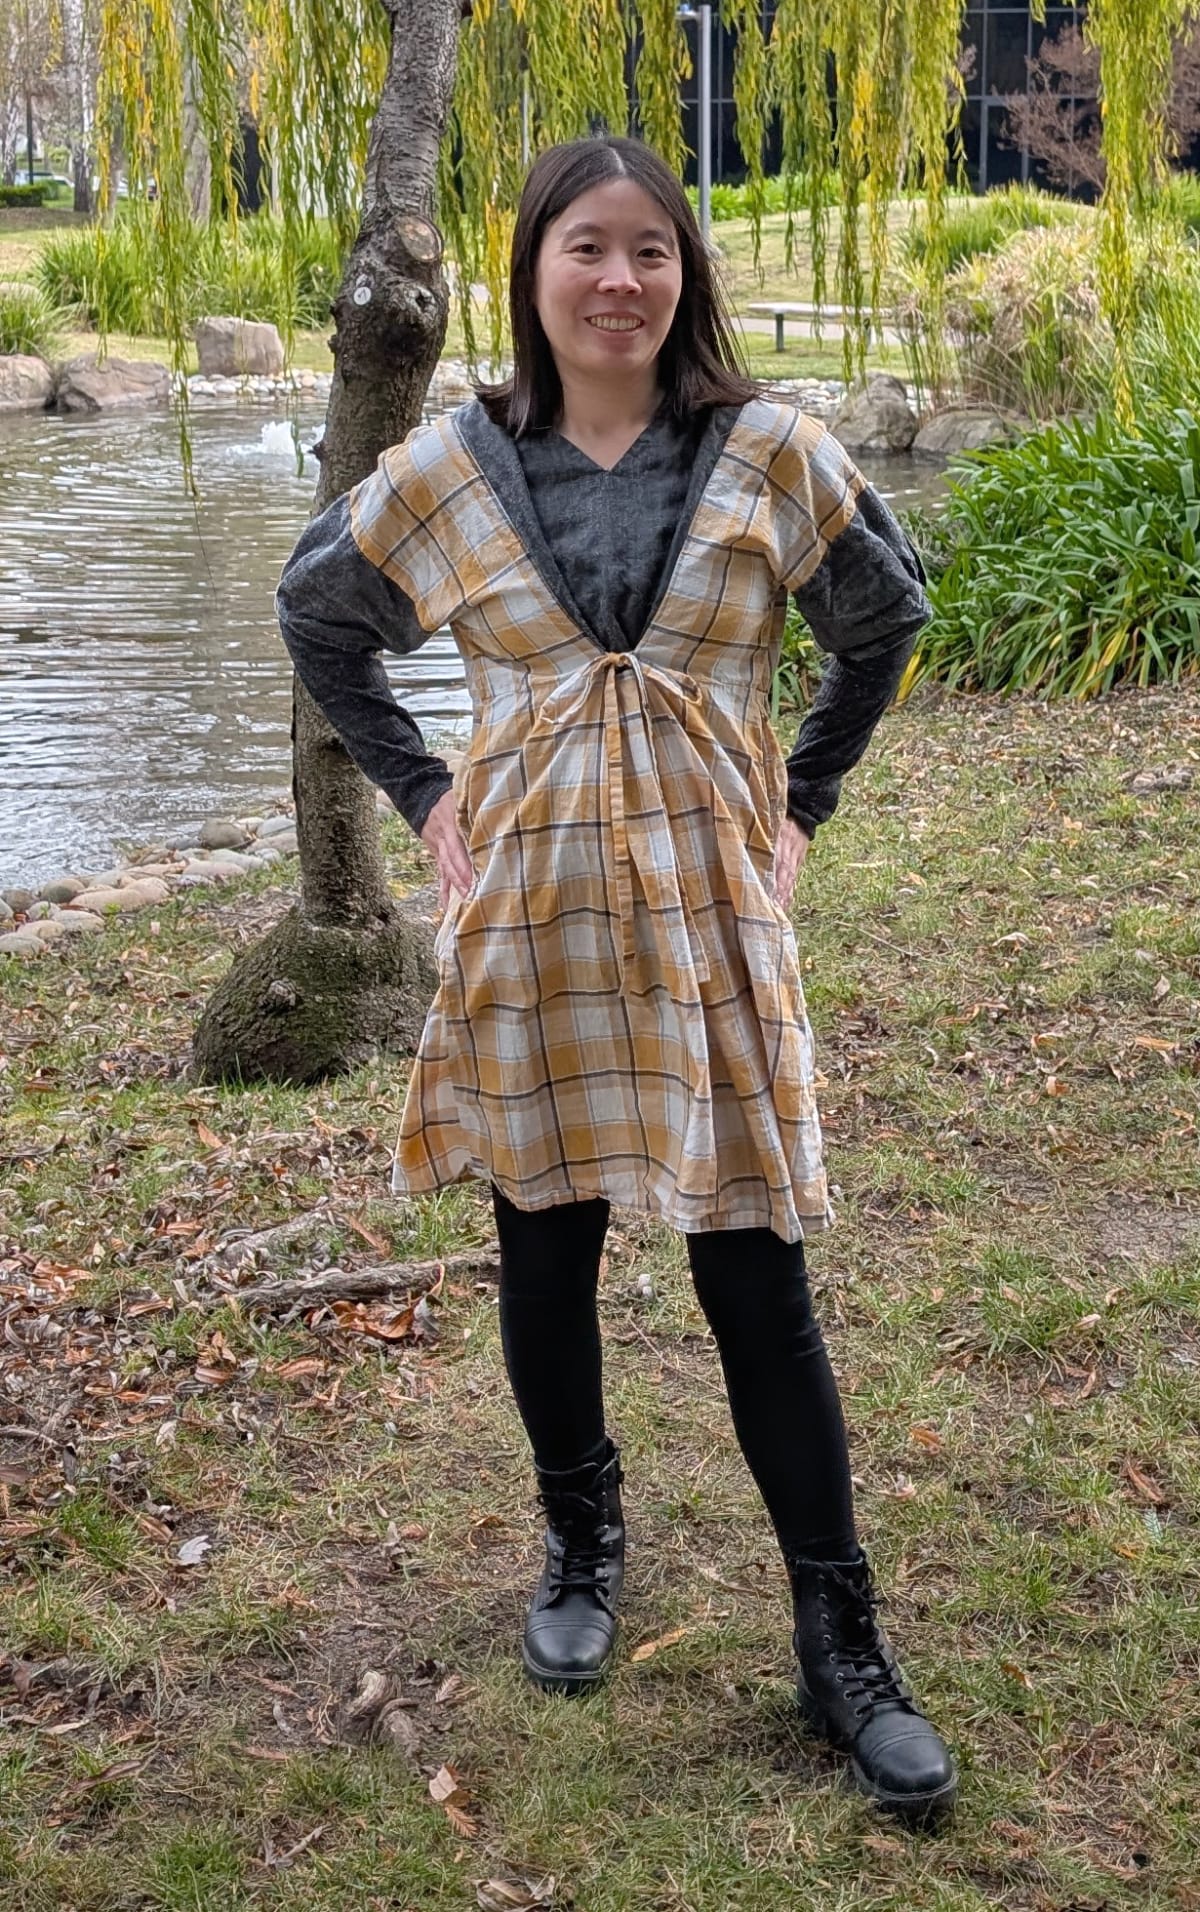
Result
After countless hours of stitching and seam-ripping and more stitching, I finally finished.
I actually finished in January. You will notice that it is now the end of February. I didn't finish writing this post because I didn't have pictures of the final dress that I was satisfied with. But I did not have the motivation to take better pictures until today.
I was in the middle of doing some home server maintenance, which included upgrading Ghost and fixing my blog backup script, which never worked apparently, but good thing I have not needed the backup. Then I saw my draft, looking at me with its sad metaphorical eyes, longing to fulfill its purpose and be seen by the world.
So I finally took better pictures. I opted to wear a mask because I realized part of why I sucked at taking pictures is because my smile was never to my liking. But I'm not here to showcase my face. I just want to show my dress. This was the perfect solution and I will probably be doing this more often.
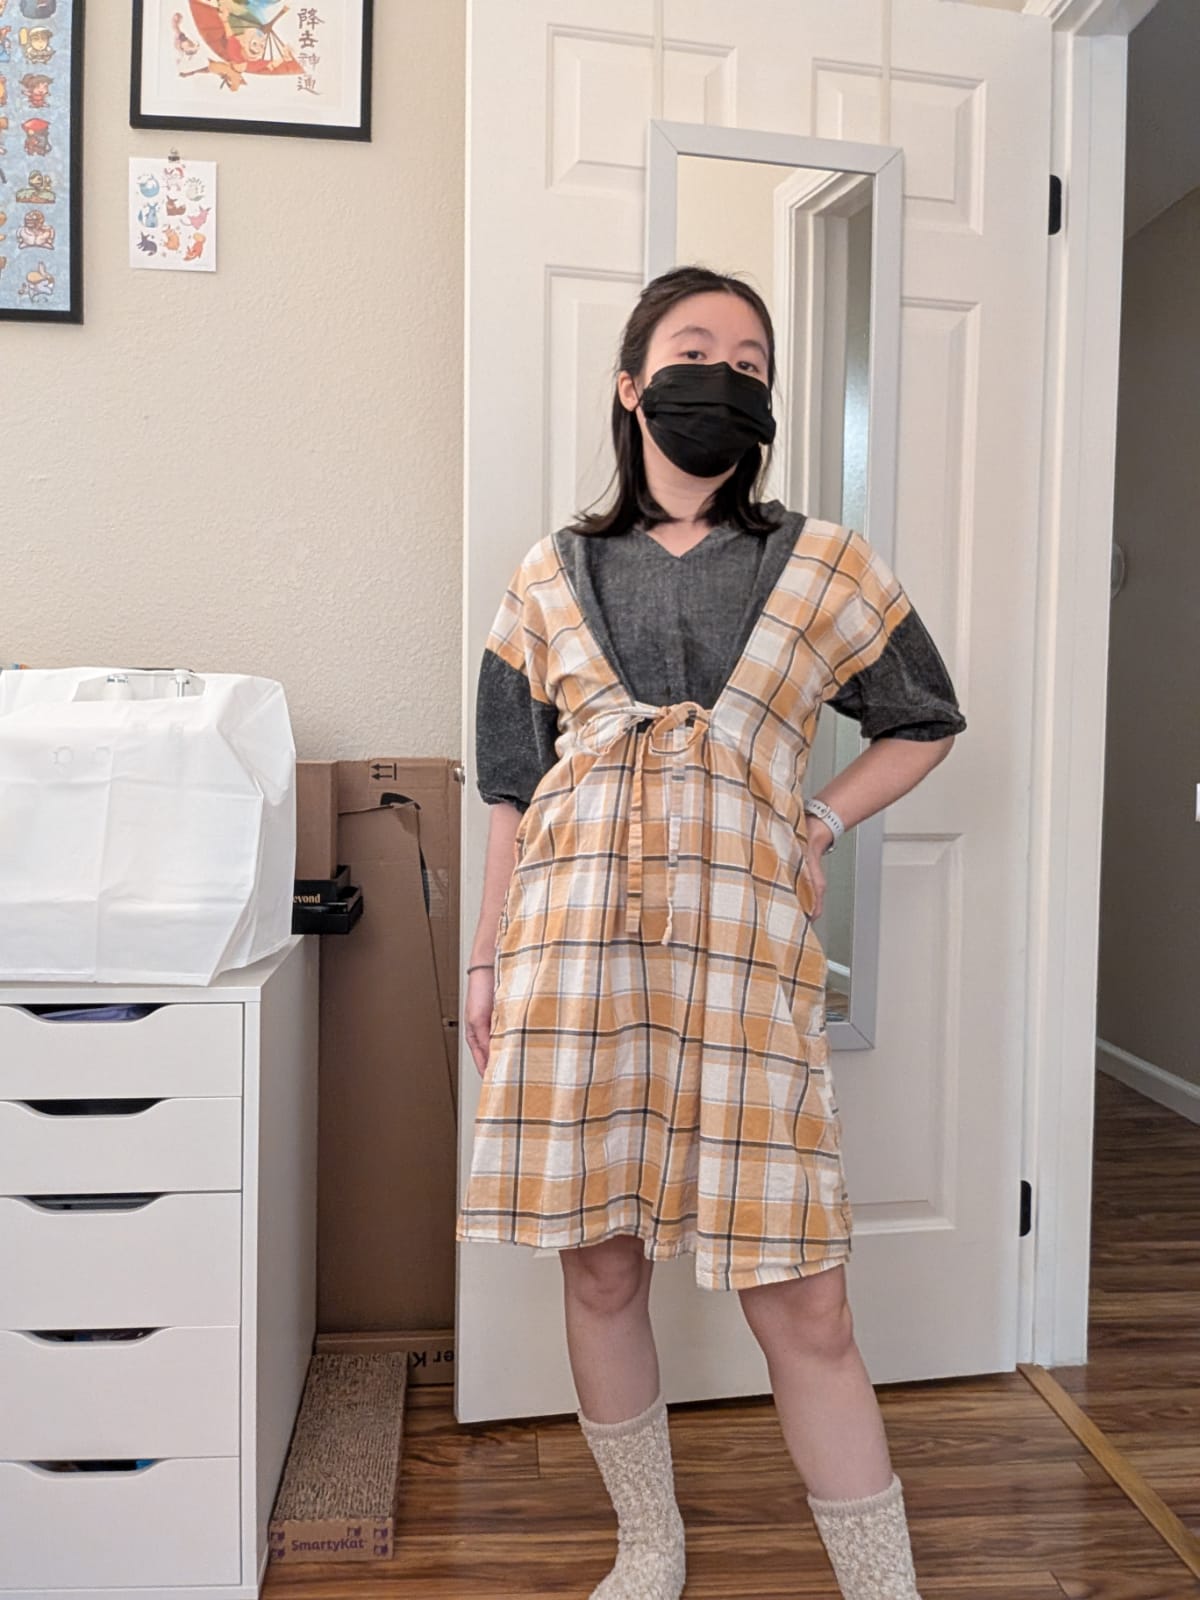

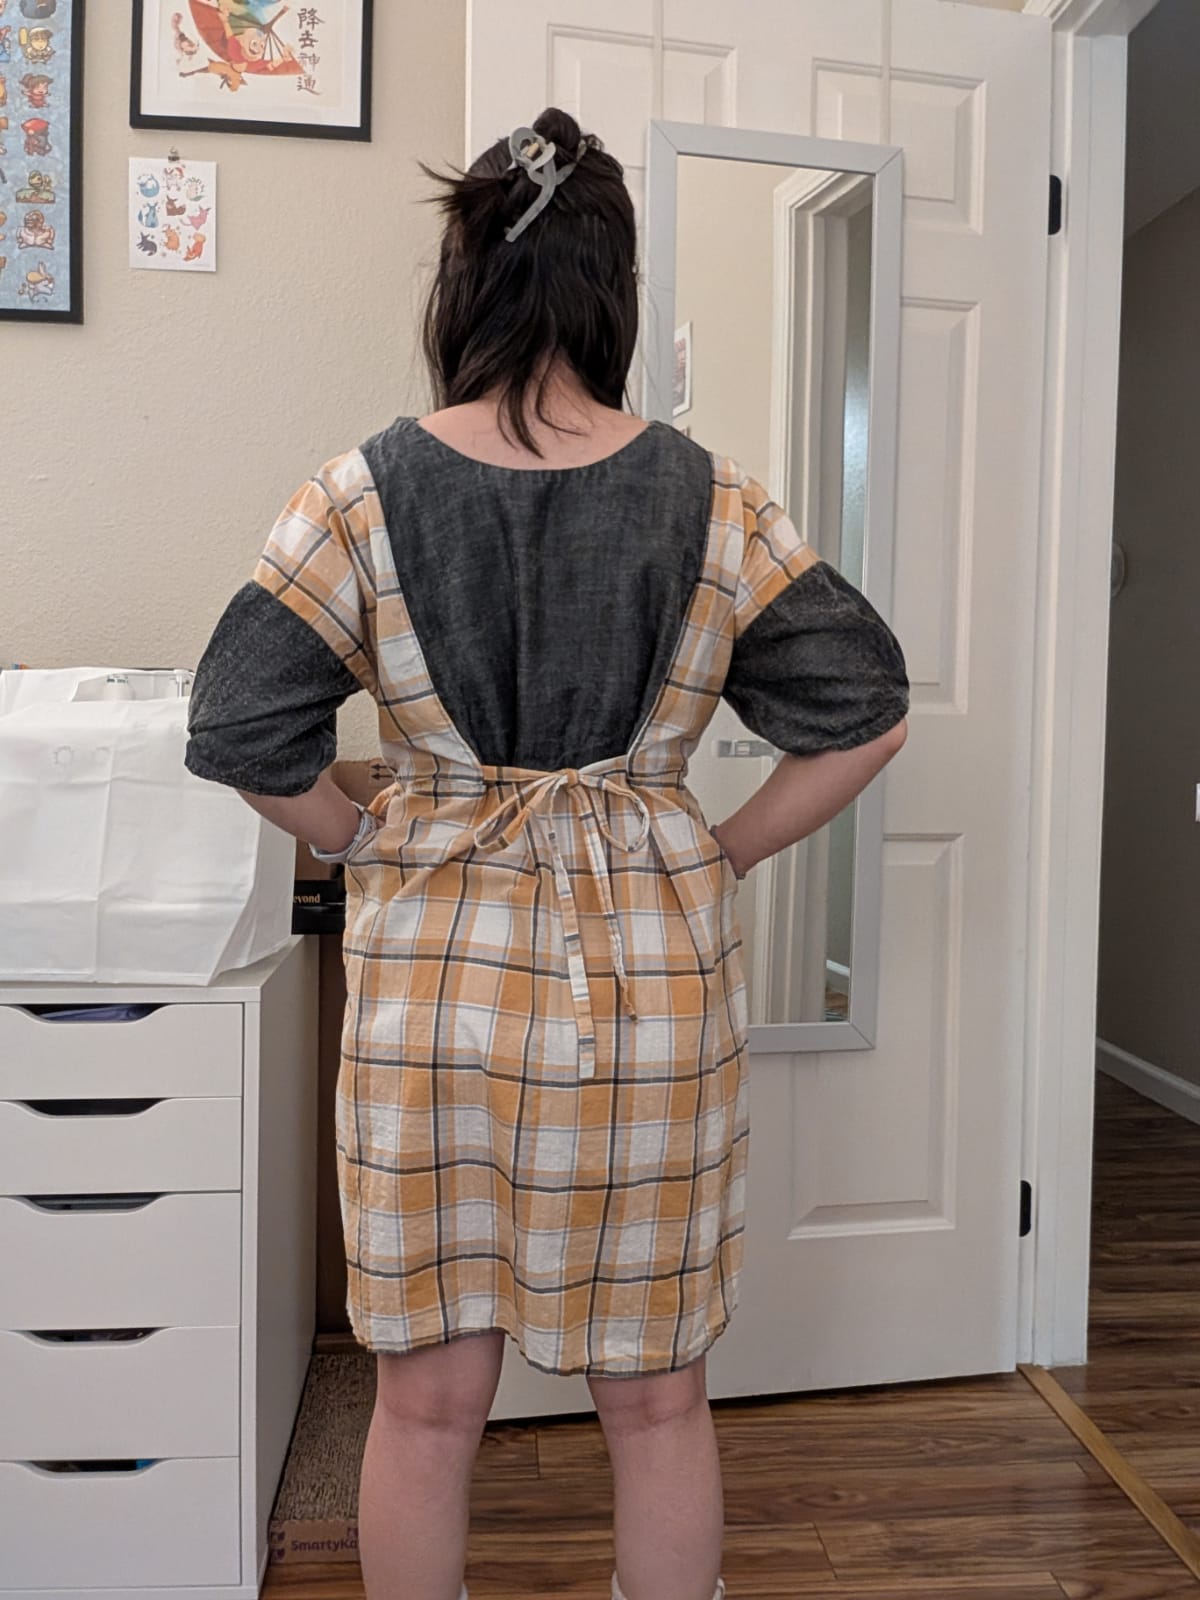
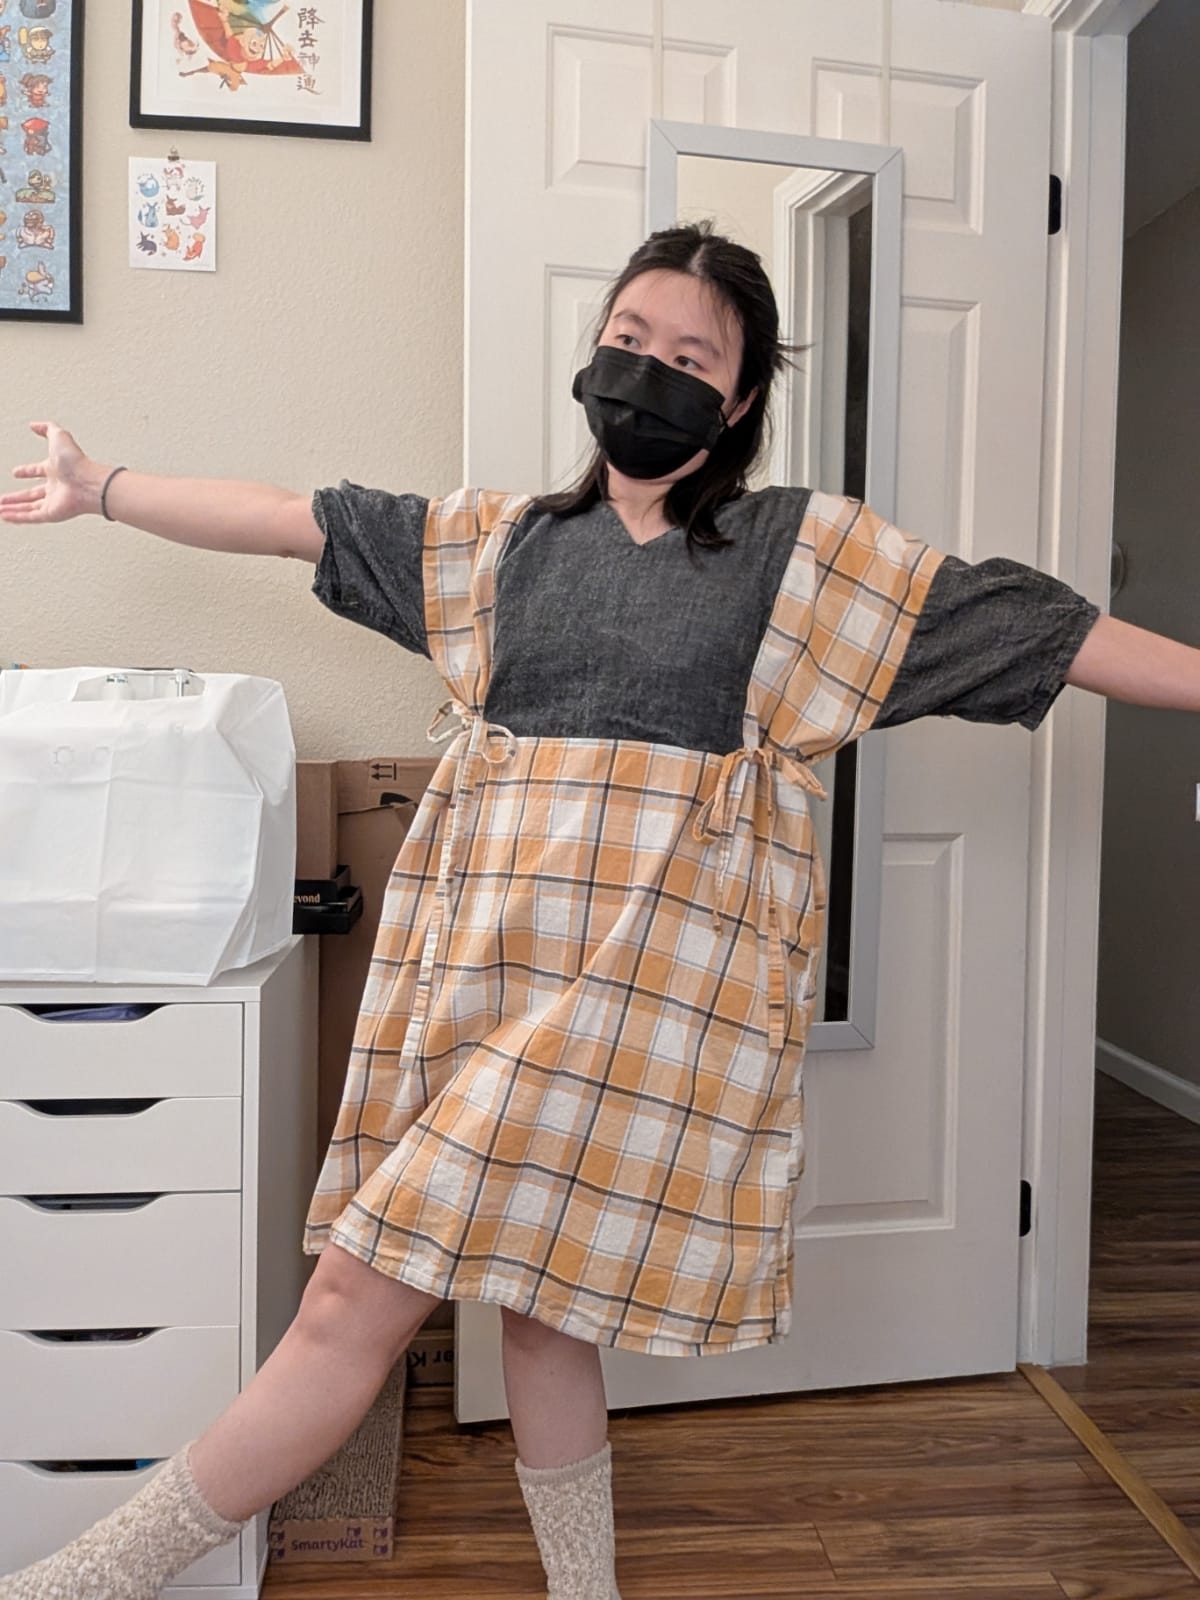
My favorite way to wear it is with the v-neck and tied in front and back. I tried tying on the sides and it's... not very flattering. I think because there is less dimension. But I've never worn it like that for more than a few minutes in the house. Maybe it's not as terrible as I think it is. It only looks cute in this picture because of the pose lol.
Am I happy with the result? Very much so! I like this one much more than my first tie dress. The fit is flattering. And the style is cute and unique. I look forward to wearing it more when the weather is warmer, but I can also wear it now in the winter as long as I layer up. The only difficulty is the poofy sleeves, which don't fit under jackets very well.
Here is a bonus picture of me wearing it outside the week after I finished it, so you can see how it looks with a long-sleeve shirt and leggings underneath.